Think of Observed Details as the knife you cut your data with.
Sounds dramatic, but Observed Details is most commonly used to define demographic type of data and enable you to filter your results even further.
It is collected via survey questions and managed through the the Observed tab. You can use them as Filters when building and editing graphs and Dashboards.
– See Dashboards in this section to learn more about applying filters to them.
Creating Observed Details
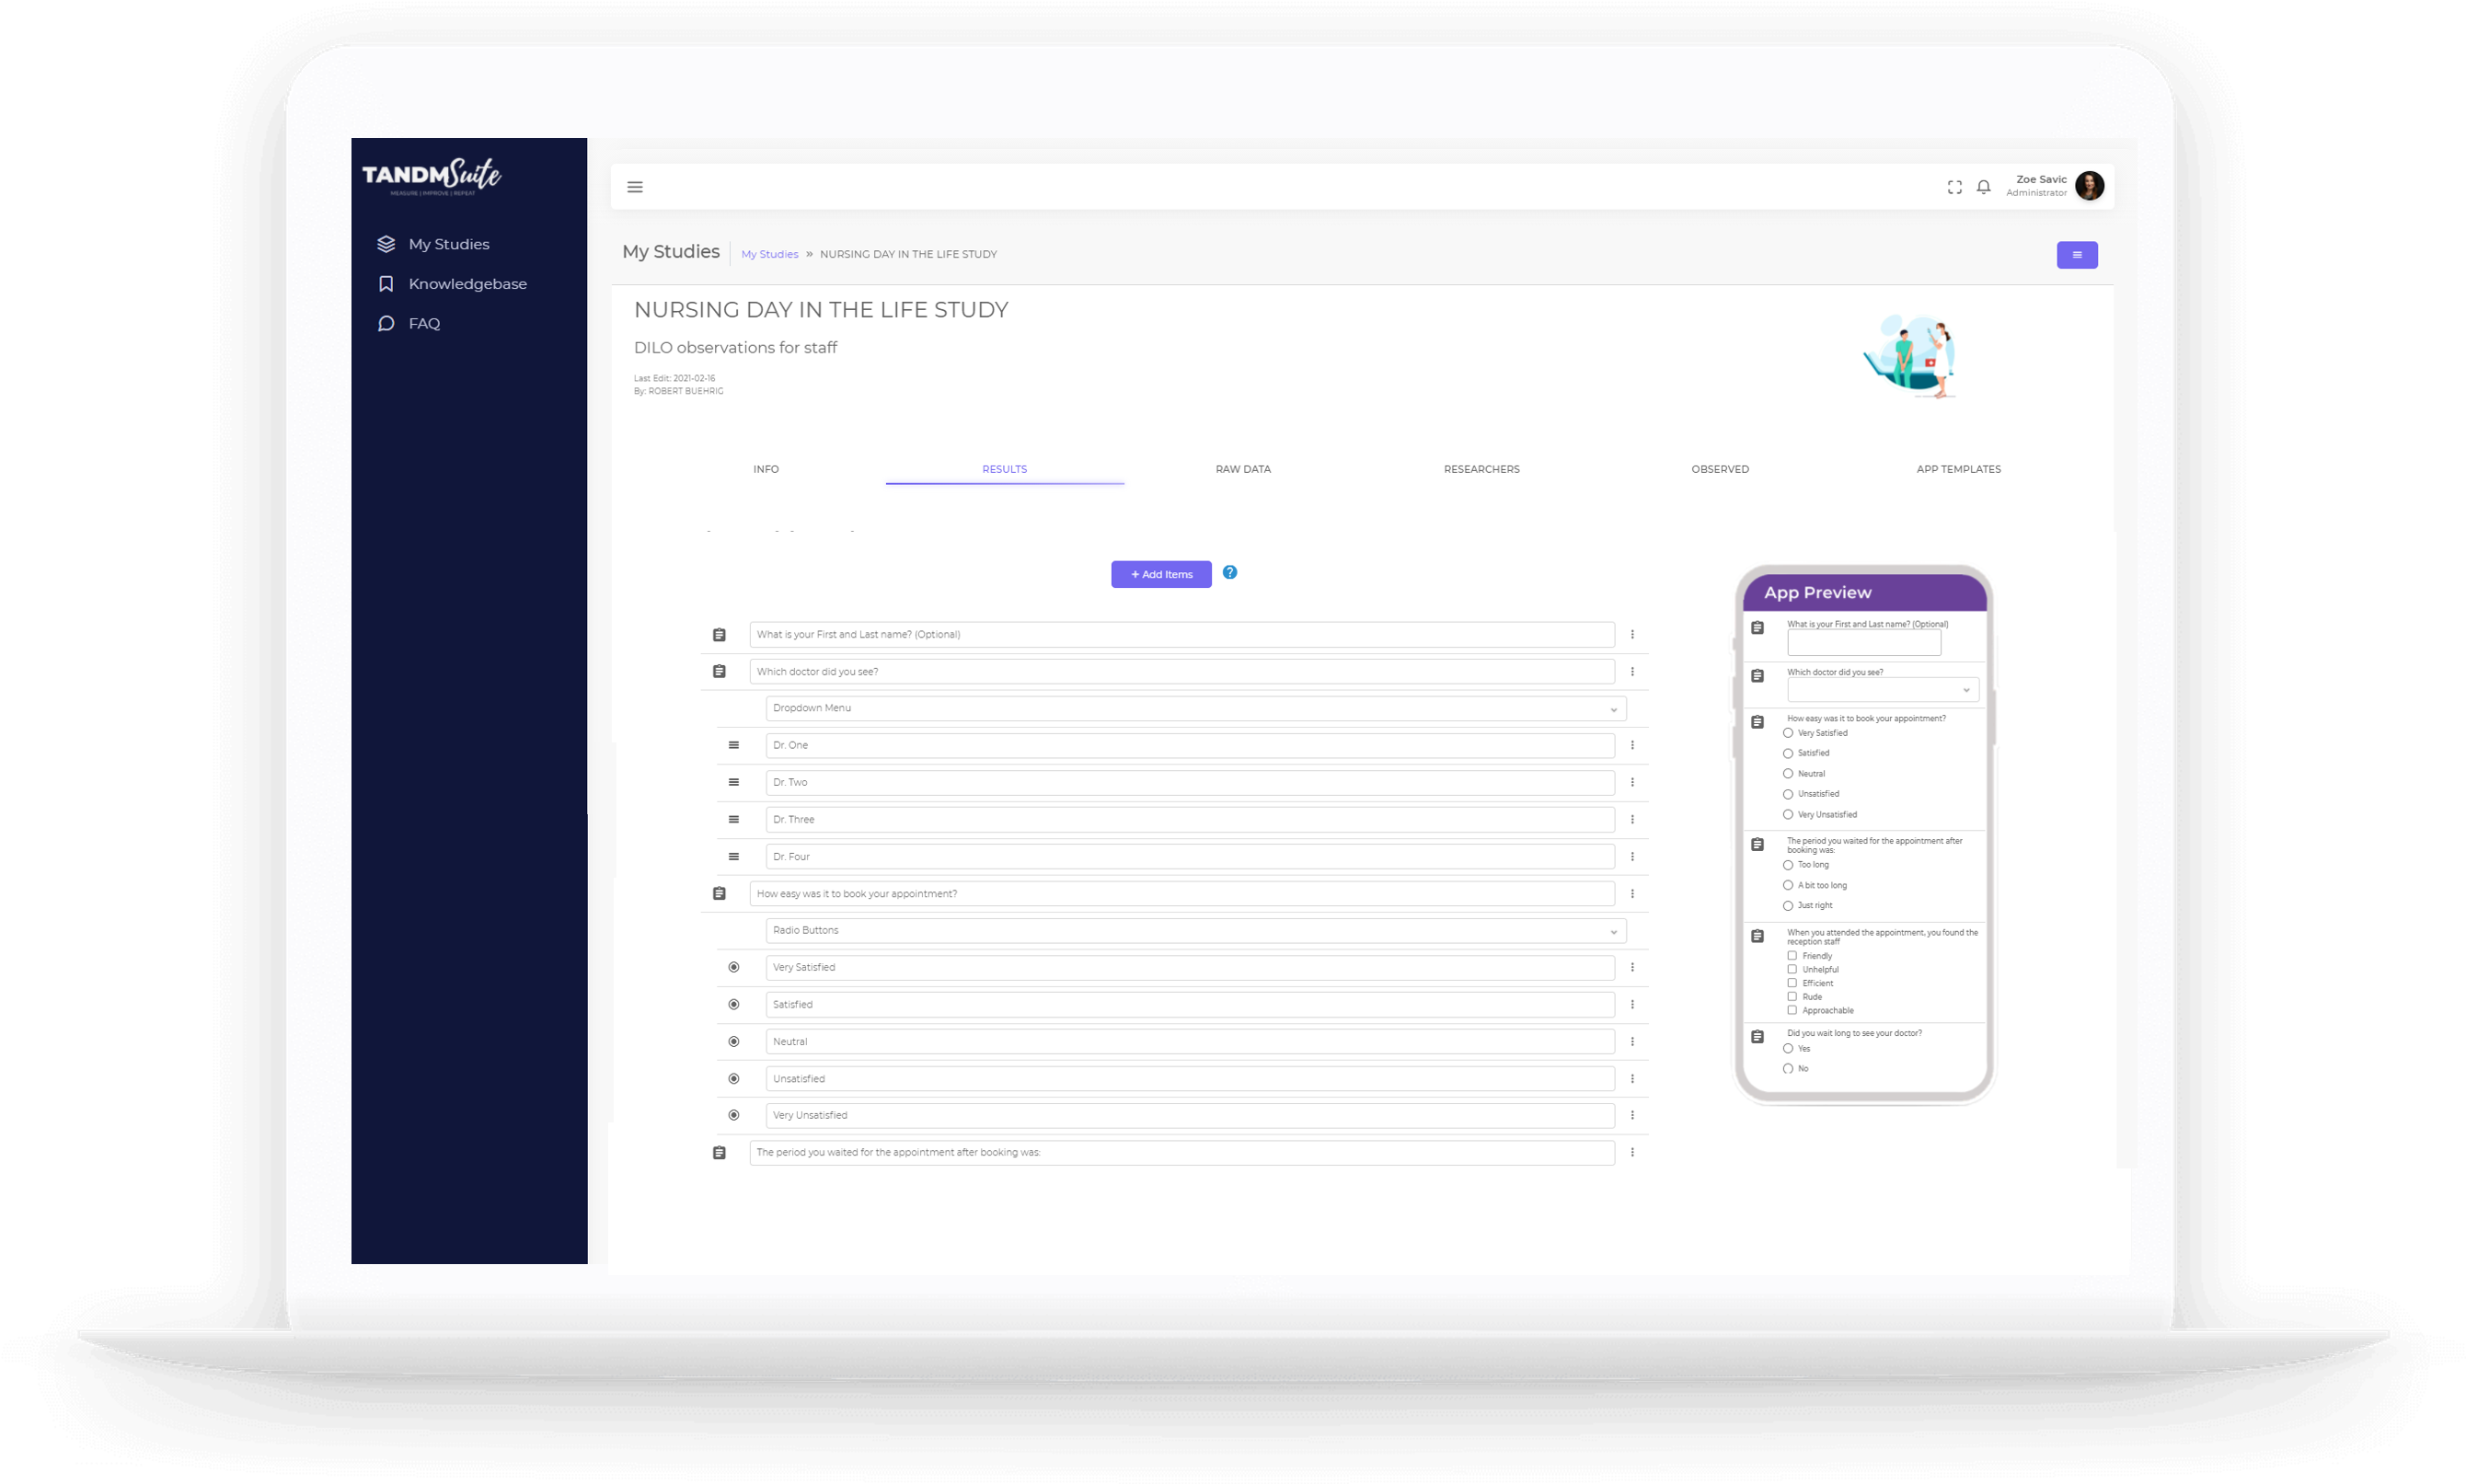
To be able to collect data for an Observed detail they first need to be created via an App Template
This can either be done when creating a new Study or editing an existing Template.
To add a Survey question:
1. Click on the purple “Add Items” button
2. Select the “Survey Items” option to reveal the menu
3. Select the relevant Survey option
4. Fill out the Question and Answer option fields
5. To give the Observed Detail a title, click on the elipses menu for the question and select Properties.
Once complete, follow the save or finish prompts as required depending on whether you are creating new or editing.

While all data collected via a Survey questions will be recorded as an Observed Detail.
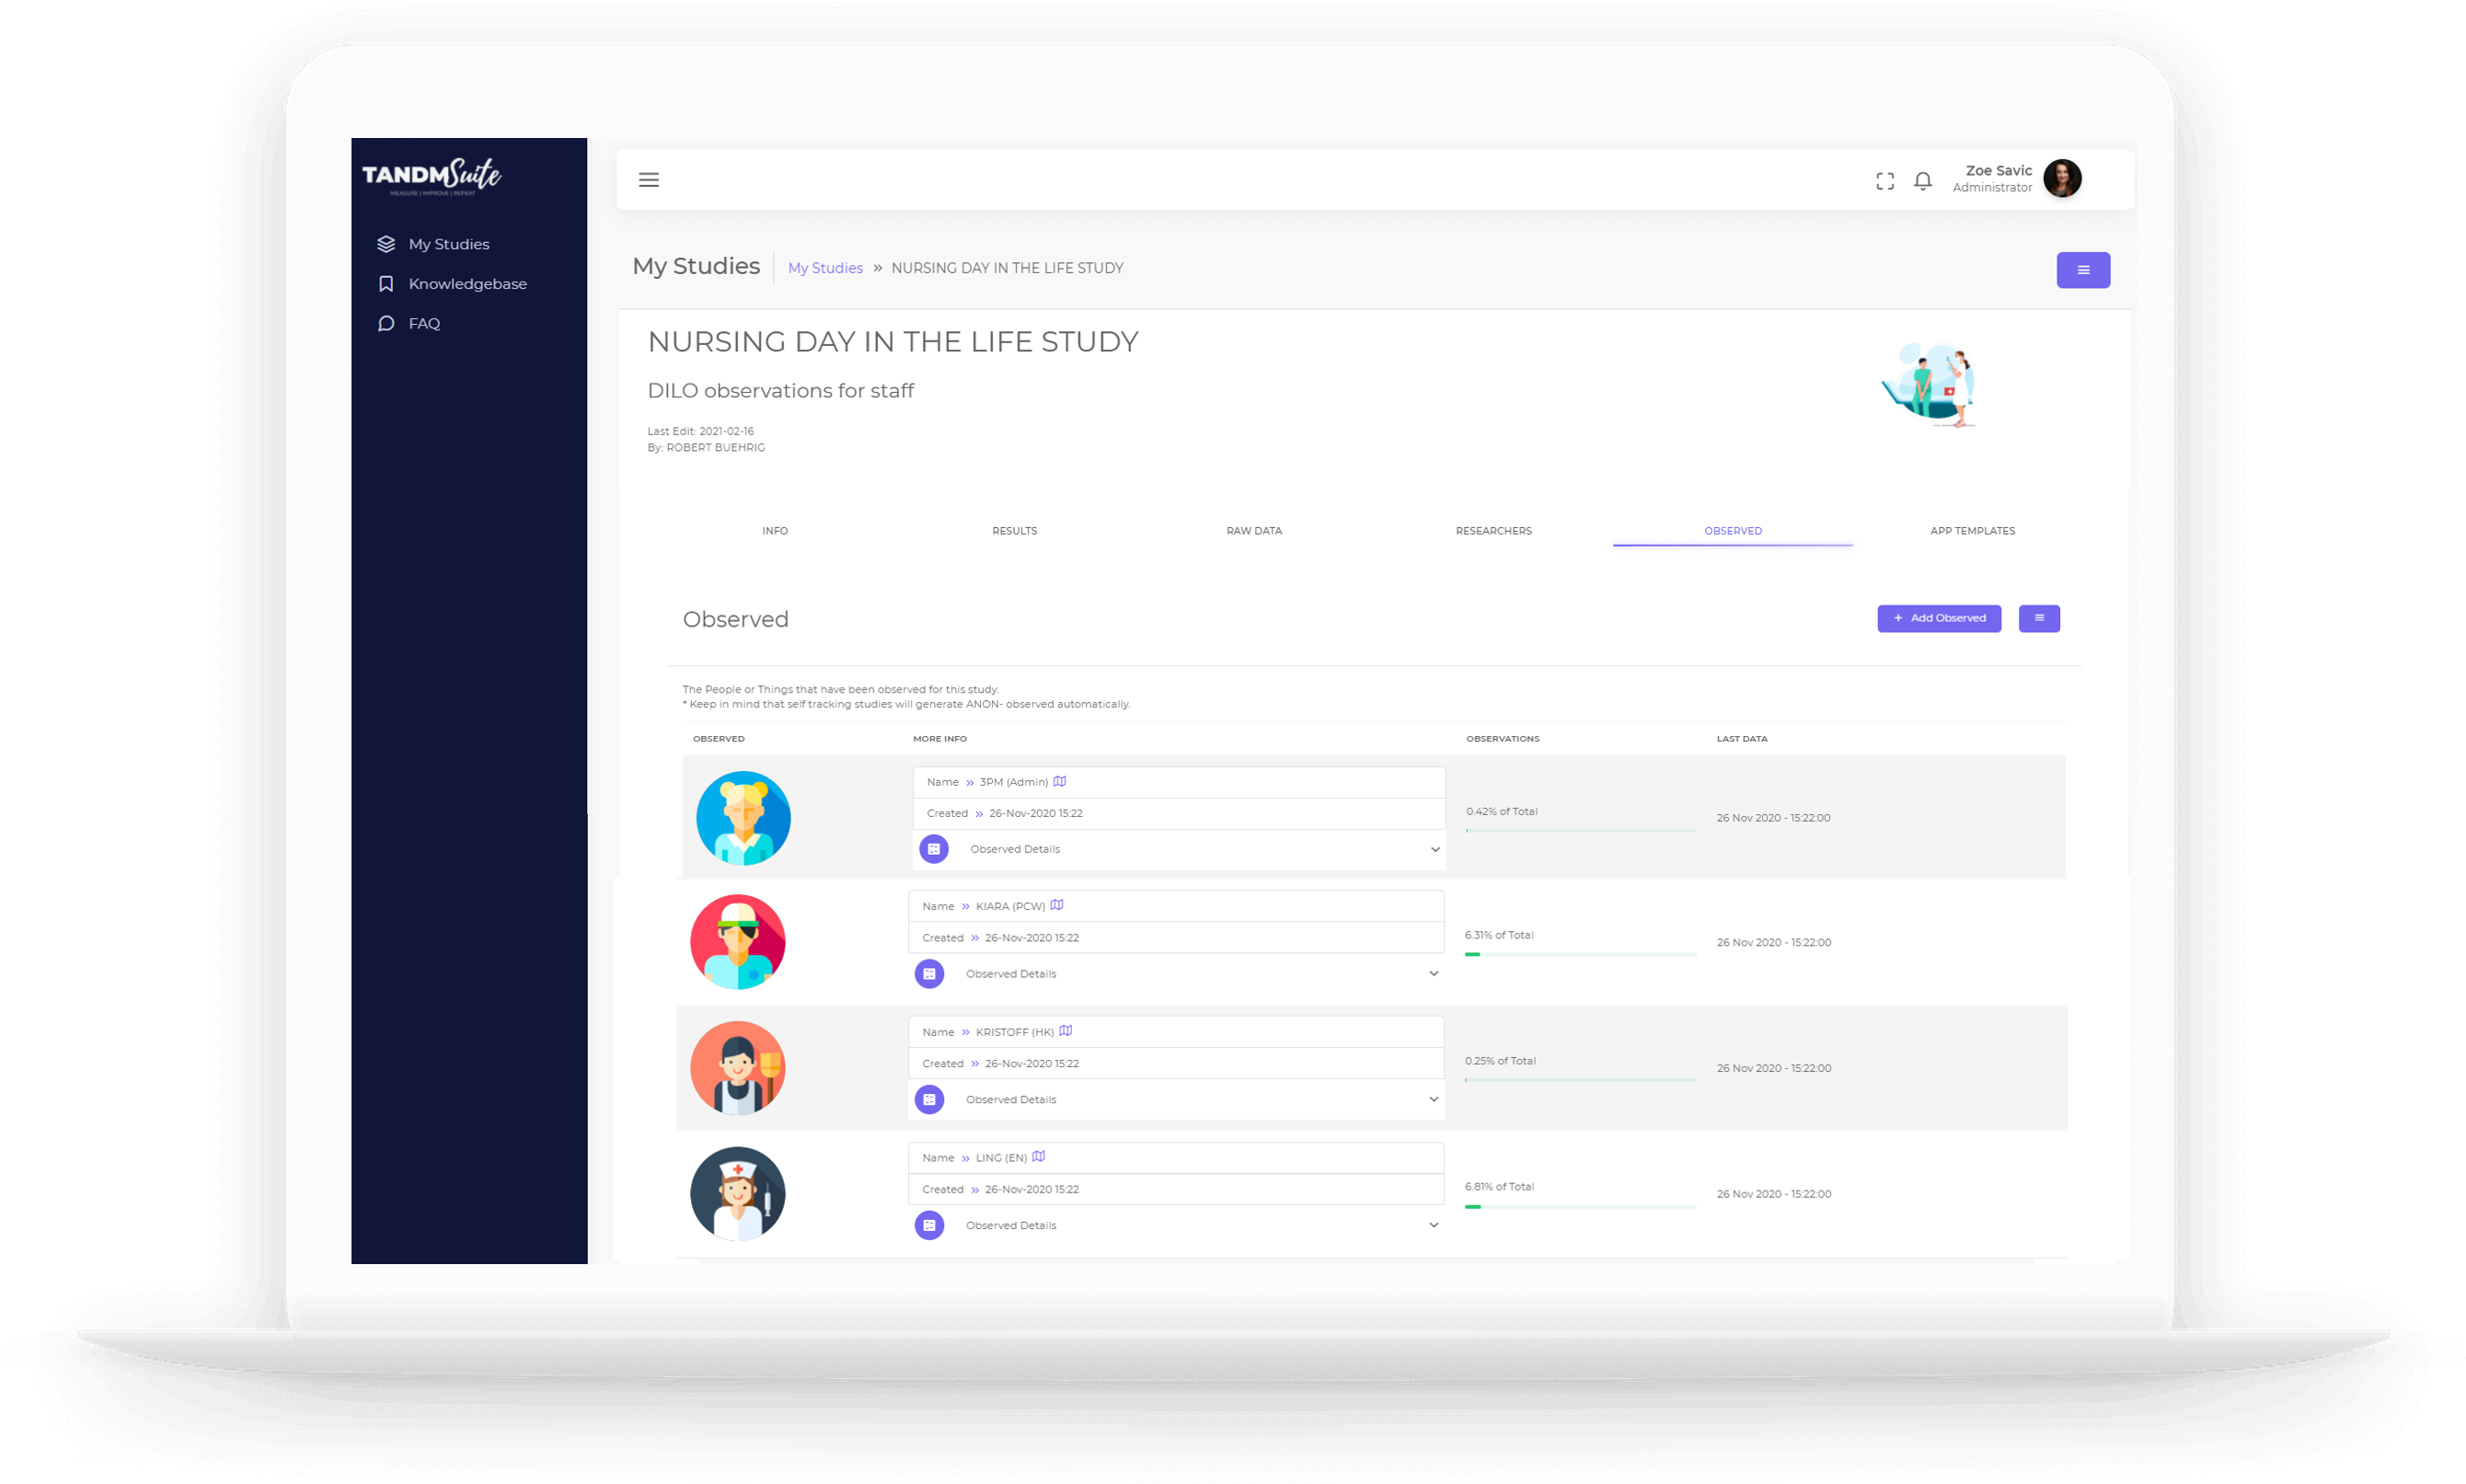
By Clicking on the Observed tab, not only will you be able to see all Observed parties, but the Observed details associated with them.
To see the Observed Details / Survey results specific to an Observed
1. Click on the Observed Details drop down to reveal all results
2. The pencil icon will allow Study Administrators to edit answers if required
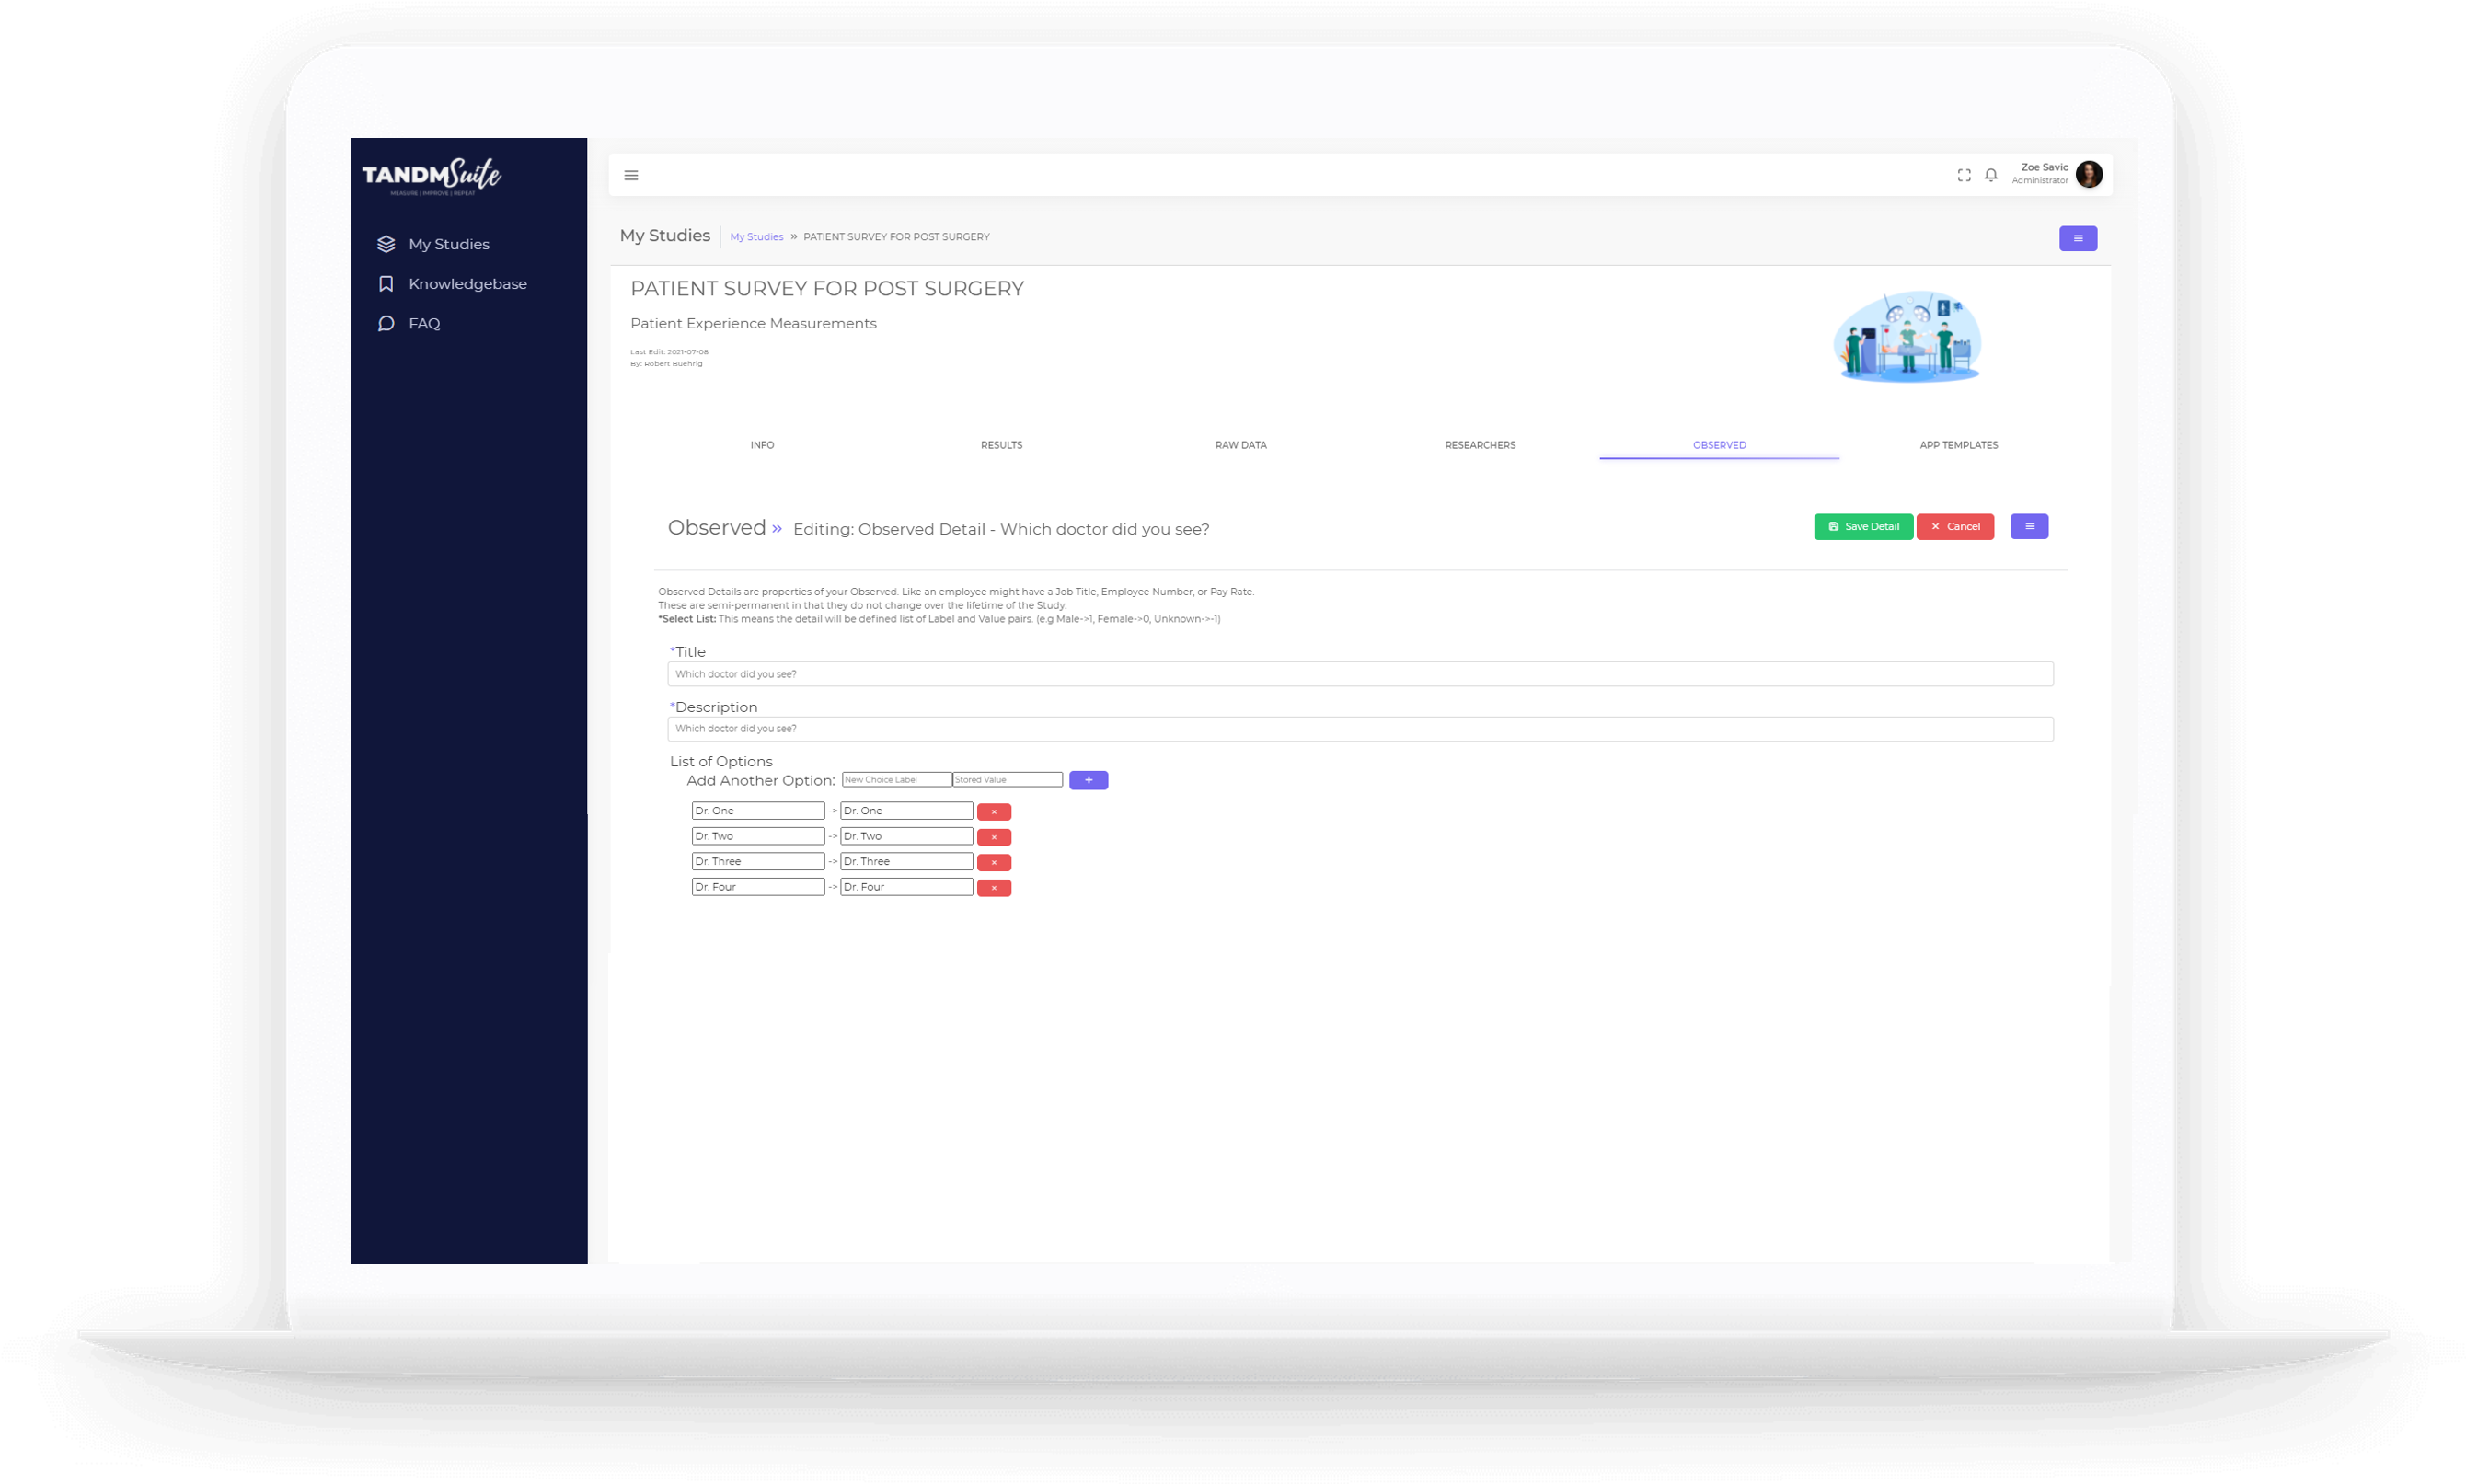
To edit the title of an Observed Detail
1. Click on an Observed icon to edit
2. Click on the pencil icon on the relevant Observed Detail entry
3. Here you can edit the title, description and add more Answer options
4. Click the green “Save Detail” button when complete. click Cancel to leave without saving changes
These changes will be applied universally. not just for specific Observed entries.
– See Graphs in this section to learn more about applying Observed Detail filters to Graphs.


